Speed Painting in Photoshop CS3
Not to be confused with the time lapse paintings available on YouTube often labeled as speed painting, real speed painting is a practice by which an artist gives him/herself a, usually short, time limit to lay out a painting or composition.
Speed paintings generally do not involve a beginning sketch. Instead the artist lays out block and shapes of color to begin to establish the basic composition, values and volume.
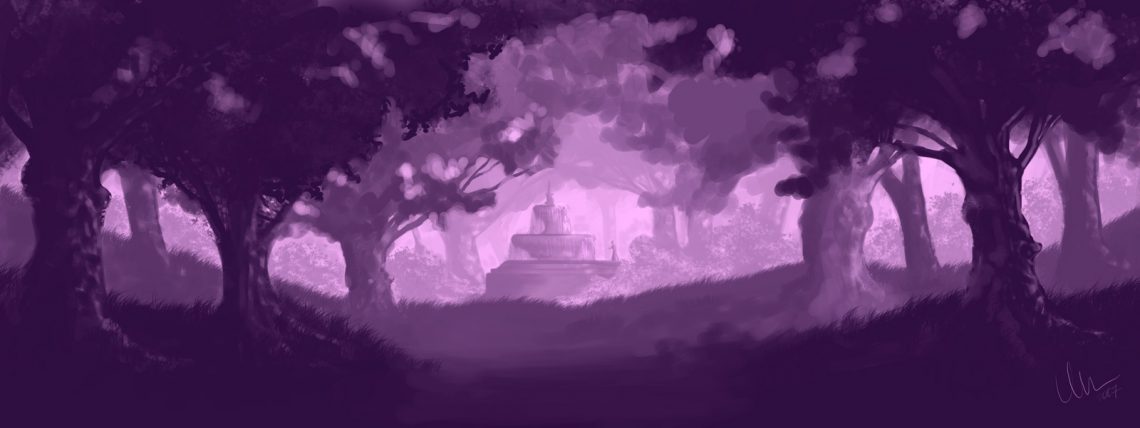
Playing with the concept, I created this painting in Photoshop CS3 [though the speed part isn’t quite there – it took around 3 hours to get to this point]. I plan to keep working with the process in hopes that it will help speed up my normal painting process as well [not to mention that these are just fun to do]. Some of the steps and a mini-tutorial for this painting are after the jump.
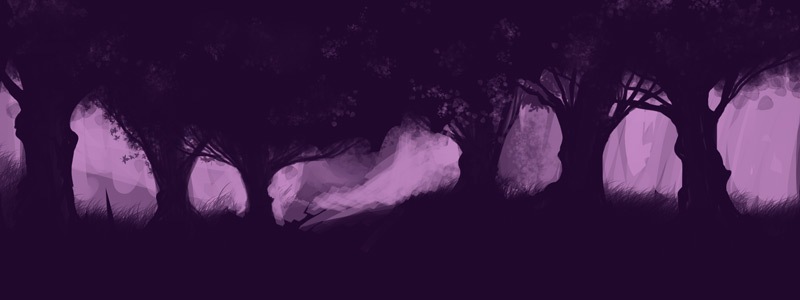
The first step involved blocking in a light background color on top of a dark digital canvas. During this step, I left dark areas for the tree trunks, the ground plane and the tree canopy. After the basic background chunks were in place, I detailed the trees a little by adding branches and some texture in the canopy and also some grass on the ground.
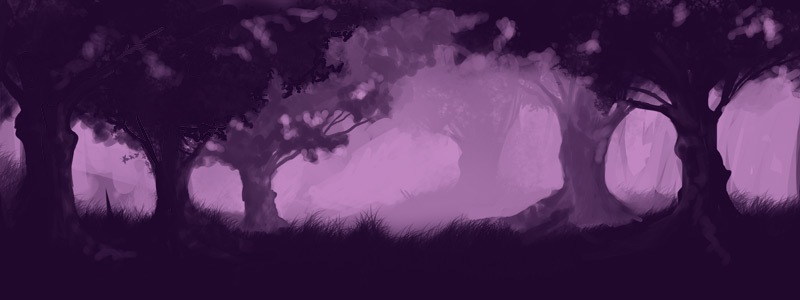
After the first step, all of the trees were on the same visual plane and had no depth or volume. The next steps involved pushing the trees into different levels of the background and establishing various mid-planes to give the painting a feeling of depth. Notice the use of atmospheric perspective to push the trees back. The result gives emphasis to the foreground.
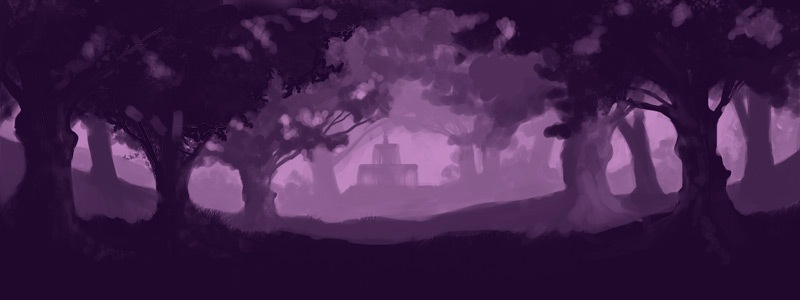
More detailing and adding in more elements to the image. I also chose to lessen the atmospheric perspective to make the scene appear less foggy and also added another visual plane with the fountain in the background.
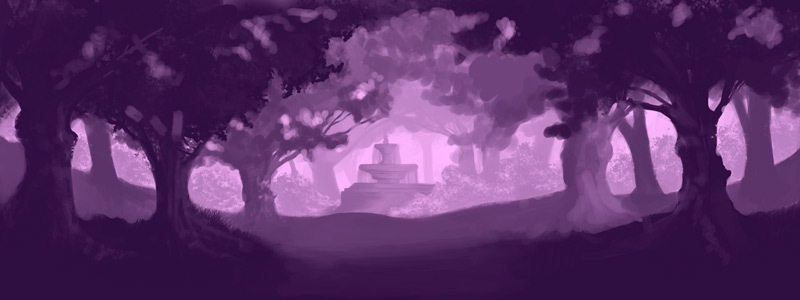
A quick contrast and brightness adjustment gives the scene a glowing quality. Further detailing is added with carious brushes to bring in a little texture and some highlights in the fountain’s plane to show a break in the tree canopy. Also added yet another background plane behind the fountain to push the depth of the painting even more.

After more time adding in details, highlights, a little blending I decided to call it quits. I also added a person standing on the fountain’s platform to give the scene a sense of scale. You can barely see her, but she is on the right hand side of the fountain in the painting. Since she is so small, the fountain appears to be HUGE [and it is – even though the perspective isn’t accurate].
The “finished” painting still has a rough feel to it, which is a look I enjoy in paintings of this variety because the final painting shows some of the process taken to get to the final stage. Brush strokes aren’t finely blended in and the whole piece takes on a very organic feel.
Three Speed Painting Tips:
- Work in a zoomed out view. Zooming in causes you to focus in on details which aren’t always needed to to establish the illusions necessary to convey the piece.
- Like with all painting, use the largest brush possible for the area you’re painting. The final result will feel more natural. Reserve the small brushes for detail painting.
- Establish main values and planes quickly in the beginning. This will make the rest of the painting process easier because you won’t have to change values on more detailed areas of the later in the process if there is an error.