Search Results
The current version of Brush Manager will not receive an update specifically for Painter 12; other plans are in the works. However, the current version is compatible with Painter 12. Here’s what to do:
- Open the Settings panel by clicking the wrench icon in the title bar.
- Leave your settings the way they are, especially User Mode which should be set to YES for most users. If you use a location that isn’t one of the default locations for Painter (ex. a folder on D: drive), skip steps 3 and 4.
- For consistency choose Painter 11 from the Painter Version drop down.
- Click the button that says Set to Default Location, then check the checkbox beside it for using a custom path.
- If your path uses Application Data or AppData in Windows or Application Support on Mac OS, change 11 (or your version number) to 12 — this should be most users. If your path uses Program Files on Windows or Applications in Mac OS, change “Corel Painter 11” to “Painter12″ with no spaces. Windows 64-bit users should also remove ” (x86)” — the space in front of it too– from the Program Files folder name.
That’s it! This will install brushes into the Default workspace in the Painter Brushes library. Changing “Default” to another workspace name will use that workspace instead. Changing “Painter Brushes” to another library name will use that library instead. It’s all pretty straightforward.
If you do choose to use a different workspace or library, my recommendation is to use the Browse button that opens beside the path’s text box, just to make sure spelling and spacing are exact. The folder selection dialog that opens will be set to your current location and you should be able to see the folders for your other workspaces. Expand a workspace along with its Brushes folder and choose a library (any folder inside of the Brushes folder) and click OK. Now Brush Manager will install into the chosen workspace and library.
First, we’ll start off with a simple truth about “purchasing” software – When you buy software, you aren’t buying the software itself [the software remains the property of the publisher], but instead you’re buying a license to use the software. Corel uses a single general license that covers use cases for specific “versions” of Painter X (and other software packages). The confusing part comes in because every “version” of Painter X is the same full software. That’s right – the trial, educational and full versions of Painter are all fully featured software. The difference between them is in the license terms that apply.
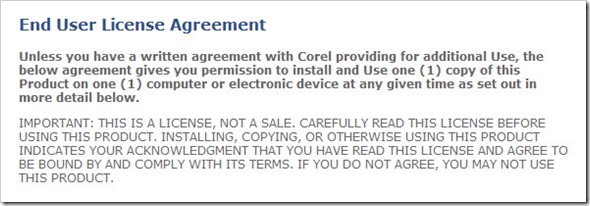
Are the different versions of Painter X really different? Reading through the license provided by Corel, here are my impressions of the license and some helpful tips for those trying to decide which version is the right version for you.

In the last post, we explored some of the license options offered by Corel for Painter X. In this post, we’ll focus on educational uses of Painter. Being an instructor at Digital Art Academy, which is an authorized Corel Training Partner, students often ask if they should purchase the educational version of Painter instead of the full version. In my opinion, most students (at least for DAA) should skip the educational version and go for the full version instead.
First and foremost, the educational version limits using the software for commercial purposes. Chances are, if you’re taking a class to learn Painter, at some point you may want to sell your work. To my knowledge, Corel doesn’t have an upgrade path from Educational to Full [if this is incorrect, someone please point me in the right direction]. This means that in addition to purchasing the educational version, you’ll also have to turn around and buy the full version at full price as well.
Also, as noted in the previous post, once class is over and you’re no longer a student, the educational licence is void (terminated), and by the license “You agree, upon termination, to destroy all copies of the Product.”
Make the Most of a Trial Instead
For students (or potential students) who have not given Painter a try and aren’t sure if they’ll be able to get the hang of it, download the free 30-day Trial and sign up for a class (use the money you’d pay for the educational version for actual education). For instance, classes at DAA are 4 weeks long (28 days). This gives you the opportunity to test out the software, find all the good features and use them, and most of all cuts through some of the intimidation that new software often brings. At the end of class, you still have two days to decide whether or not you enjoy Painter and want to treat yourself to the full version.
Of course, this can apply to other software as well.
If using this method though, be sure to not install the trial until the first day of your class. It is also important to note that once a 30-day trial has expired, you will not be able to reset the time limit or extend the time limit by installing the trial version again.
Moving Forward with the Full Version
After you’ve had a chance to finish a class, and properly evaluate the trial version of the software, purchase the full version (if you liked the software) as an investment in your happiness and move forward with your goals. Take another class to improve skills, start marketing a new service, enter your work into shows, or just continue to have fun with the software. Skipping the educational version and going straight to the full version, you’re not held back by the license in terms of what you can and cannot do with the software. This opens up a world of possibilities, even for students.
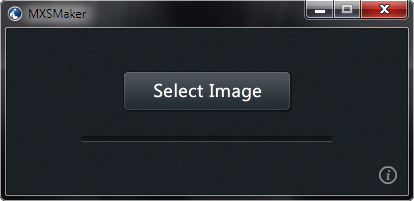
Painter has a few ways of creating color palettes from images whether it be through color sets, the Match Color command or the stylistic coloring achieved through automatic processes such as in the Underpainting panel. Now, add one more: the Mixer panel. With MXSMaker, it is very easy to convert any JPG, PNG or GIF file, with transparency preserved, into a Mixer Pad file that can be loaded directly into the Mixer panel of Painter 8.1 through Painter 12.
This project is obsolete. Corel Painter introduced new ZIP-based file formats for importing and exporting brush variants, brush categories and brush libraries in Corel Painter 12.
In my last post, I pointed out some of the problems with the way Painter brushes are currently shared. There are so many different ways that work that the whole process becomes very complicated very quickly. Of course the studio|chris Brush Manager solves the installation issues in many cases, but it doesn’t cover everything as mentioned in my last post. With that, I present a draft of the studio|chris Brush Metapackage (“Brush Package” for short) – a brand new file format designed specifically for sharing and installing Painter brushes in a very consistent way – whether you choose to use the Brush Manager or not.

Brush Package icon draft.
The full specification for the file format is still being written, but the in-progress draft is available for review and open for discussion here in this post (feedback, questions, and suggestions are welcomed in the comments!). The new Brush Package format solves every single problem discussed in the previous post amongst others.
Brush Package support will begin with the next version of the Brush Manager.
A Note to Brush Publishers & Painter Instructors
For those of you who switched to creating only Brush Manager compatible ZIP files – thank you! We all have to work together to make installing our shared brushes as easy as possible for users of all skill levels. This new format is intended to continue along the path to simplifying for those that use the Brush Manager, but also for those who do not. As the format shapes up, I’ll need your help once again to switch over to the new format instead of normal ZIP files. I’ll gladly offer help to make the switch if you need it, but with the automated process to be built into the Brush Manager, you shouldn’t – just click a “Package to Share” button, fill in some important details and be ready to rock.
Of course, there are more features that come into play with the new format, but I can’t go into that just yet – but it is going to be great!
Painter users, I present the first public beta of the Studio|chris Brush Installer for Corel Painter X. I can’t even begin to count the number of questions posted on various forums across the web asking how to install brushes into Painter. Now the answer is shorter than the question and ten times as fast! Drag and Drop.
NEW [Expanded] Corel Painter X Brush Installation Directions:
- Drag brush ZIP file onto your operating system inside of Brush Installer and release the mouse button.
What? You expected more directions? It really is that easy. Studio|chris Brush Installer takes all the guessing away from where to install Painter brushes because it knows where to put them and installs them automatically for you!
Go check out the master release page for all the details and the install badge!
Corel has released a service pack to users of Painter 11 on both Windows and Mac. The service pack addresses issues that some experienced with the initial release of Painter 11. To install the update automatically, open Painter and choose “Check for Updates…” from the Help menu (manual download link at the end of this post).
The areas of focus in the release include:
- Copying & Pasting
- Transformations
- Color Management
- The Eraser Tool
- General Performance
For full details of what the update includes, check out the Release Notes from Corel.
30-day Trials of Corel Painter 11 are available for download now. Go test the new features.
Corel began shipping the boxed version of Painter 11 today, so it is the perfect day to introduce public support for it in the Studio|chris Brush Manager. All new installs will automatically be the latest version, and for those of you who have already installed, just open the Settings panel and click the “Check for Updates” button to start the process. Be sure to update your settings after the installation as well.
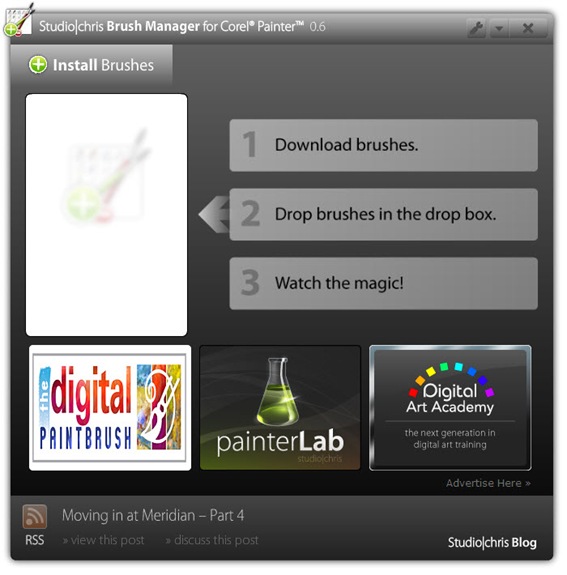
From the outside, not much has changed between this version and the last, but there were a couple of very minor bugs fixed:
- Update install ran twice during the update process in earlier versions (this caused updates to take twice as long). During the next update cycle, the update will install only one time.
- The RSS panel at the bottom of the window loaded with a lot of filler text while waiting on to see if you had an active internet connection. That clutter has been removed. As a result, it takes the RSS panel a little while longer to populate, but at least you don’t see overlapping text while waiting.
You’ll also notice the large banner for painterLab.com (which is still in the works, but you may subscribe and know exactly when it launches!) has been removed and replaced with sponsor banners. Please visit and support the sponsors as they are helping to keep the Installer portion of the Brush Manager free for everyone and also supporting future developments. If you’d like to support development directly, you may also donate to the project with PayPal.
Also, I’d like to give a quick thanks to everyone for the kind words about the Brush Manager, here, in the forums and privately. Hope you all continue to enjoy it – things will only get better!

Painter has a few ways of creating color palettes from images whether it be through color sets, the Match Color command or the stylistic coloring achieved through automatic processes such as in the Underpainting panel. Now, add one more: the Mixer panel. With MXSMaker, it is very easy to convert any JPG, PNG or GIF file, with transparency preserved, into a Mixer Pad file that can be loaded directly into the Mixer panel of Painter 8.1 through Painter 12.